
Sharing is caring

Disclosure: This post contains affiliate links, meaning, at no additional cost to you, we will earn a small commission if you click through and make a purchase. Learn more

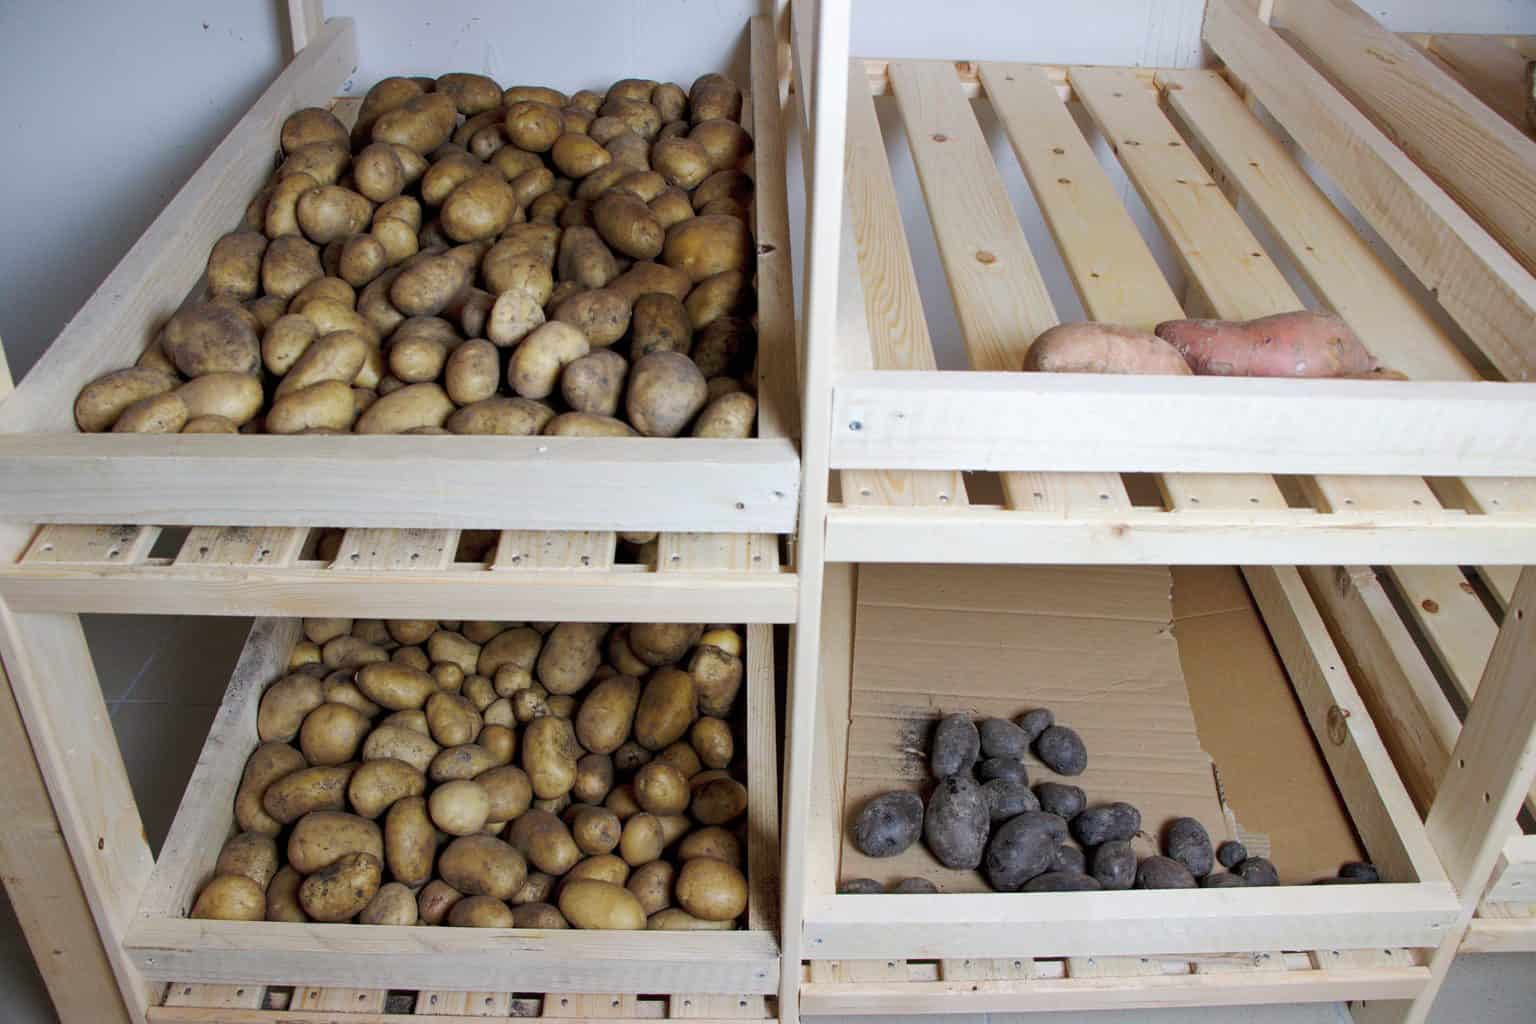
This budget-friendly DIY vegetable storage rack, built from an IKEA Hejne shelving unit, was sized to fit into the one spot with room to spare — underneath an old, twice-relocated homemade work table.

Ikea hack for vegetable storage

This is an easy IKEA hack for vegetable storage, made from an IKEA storage system. Follow these simple steps and you’ll have the perfect storage for homegrown potatoes and other vegetables.

Table of Contents

Why You Need a Special Vegetable Storage Rack

Gardening tends to bring an excess of certain vegetables come harvest time — potatoes especially. It’s always amazing how many come from planting just one potato. Since the whole harvest can’t be eaten at once, storing it optimally matters, especially with the short summer in the northern hemisphere limiting the harvest to just one season a year. A practical vegetable storage rack became genuinely important as a result.

Most older Swiss homes and apartments come with a vegetable storage rack built into their cold cellar. The very first apartment lived in had one, and it was genuinely practical for storing winter-sturdy vegetables like carrots, pumpkins, and potatoes through the long winter months.

Two decades back, winter vegetables were ordered from an organic community farm by the end of autumn, in preparation for winter — organic vegetables weren’t as easy to come by then as they are now, so that community was the best source available. With a small fridge and freezer, these storage racks were a genuine lifesaver.

How to Store Potatoes

Disclosure: This post contains affiliate links, meaning, at no additional cost to you, we will earn a small commission if you click through and make a purchase. Learn more

Potatoes should be stored in a cool, dark, dry place, like a pantry or cupboard. For homegrown potatoes, don’t wash them — just brush the soil off and use a well-ventilated container away from light to prevent sprouting. Most organic growers in Europe don’t wash potatoes meant for sale either.

In the kitchen, a Tupperware Potato Storage container handles smaller quantities. For larger amounts, wooden crates in the cellar used to do the job before this rack was built.

Tip: Don’t store potatoes together with apples or onions — for this reason, they’re kept in 2 different rooms here, so the ethylene gas from onions or apples won’t cause the potatoes to sprout new roots.

Our DIY IKEA Hack for Vegetable Storage

Deep Clean outdoor tiles without chemicals

Ingredients List

  • Hejne shelving unit + extra shelves
  • Timber roofing battens
  • Drill kit, jig saw
  • Screws, folding ruler

Cooking Instructions

  • Step 1:

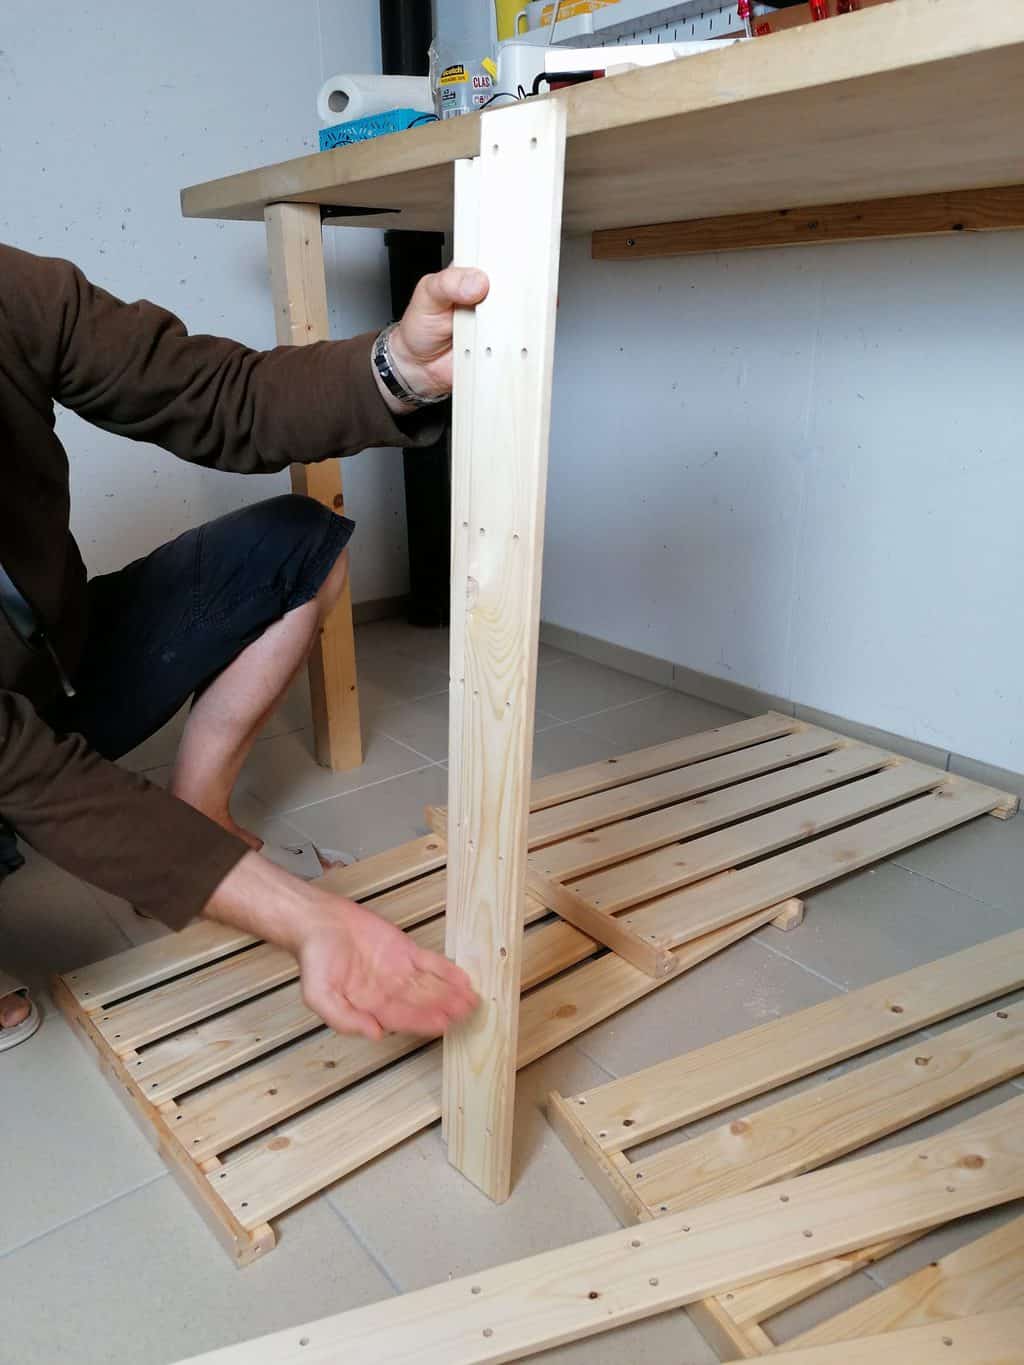
    Cut the 4 vertical frames (measuring 171cm) that support the shelves into halves, making 8 frames. Adjust these frames to the height of the table — a perfect fit here.

  • Step 2:

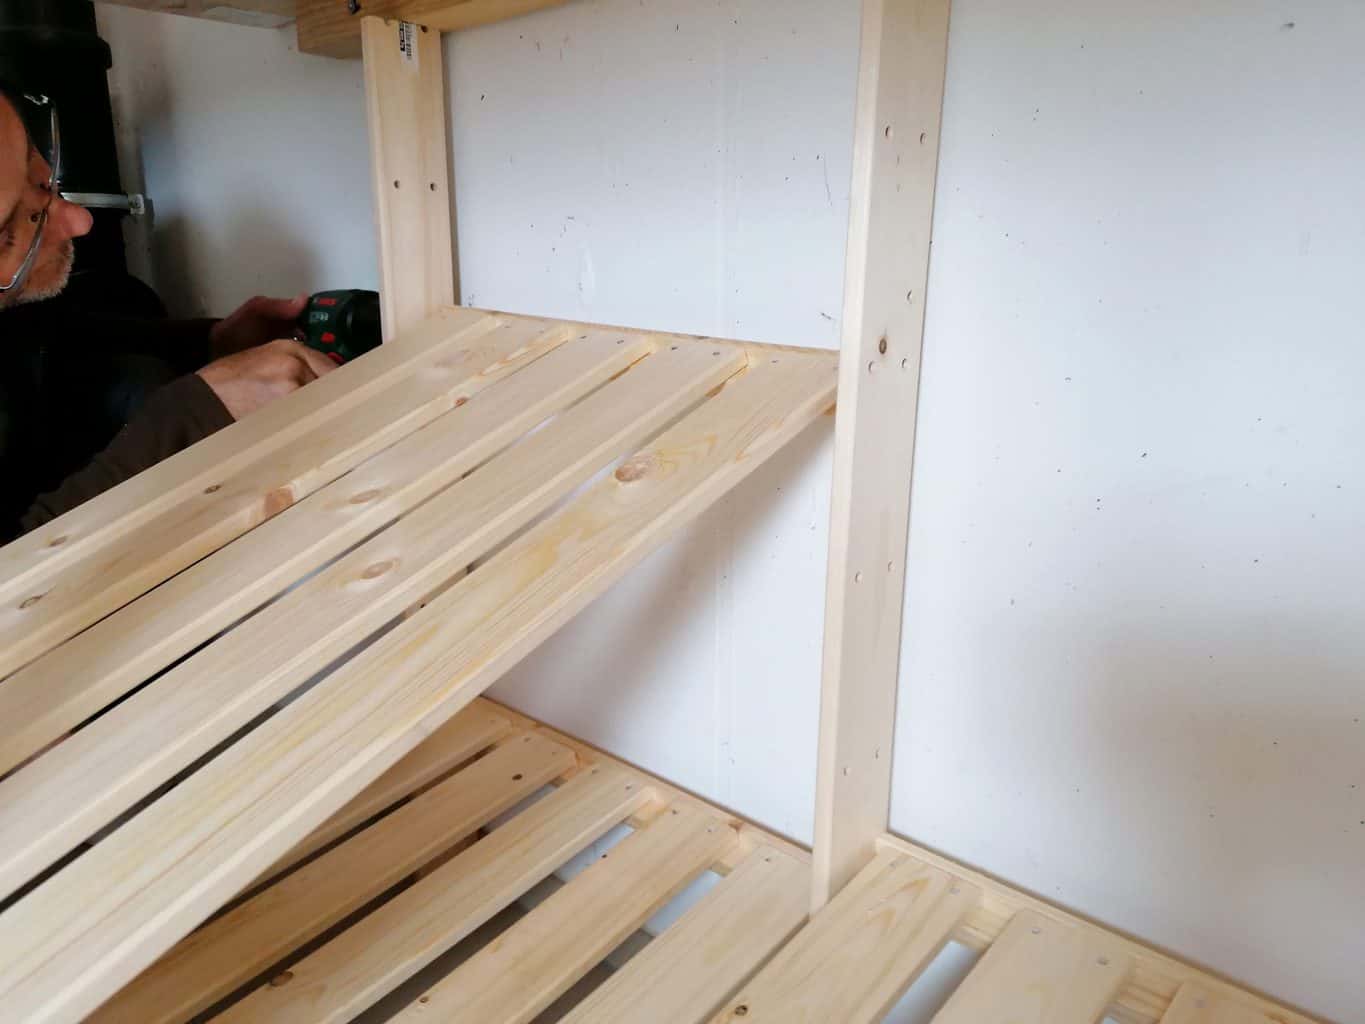
    Fix the first set of frames to the table block from below. Since the table was already attached to the wall, the frames still needed attaching to the table at the back to support the shelves. While fixing, make sure the holes in the frame mirror each other.

  • Step 3:

    Screw the first shelf in at a sloping angle, rather than straight into the slots IKEA provides — this lets potatoes roll easily.

  • Step 4:

    Fix the next frame together with the first shelf, then fix the next group of shelves.

  • Step 5:

    Fix the lower shelf about 5cm higher than the previous one. The IKEA-given slot won’t work here, since it’s already been used for the first shelf, so a new one needs to be made to fix it.

  • Step 6:

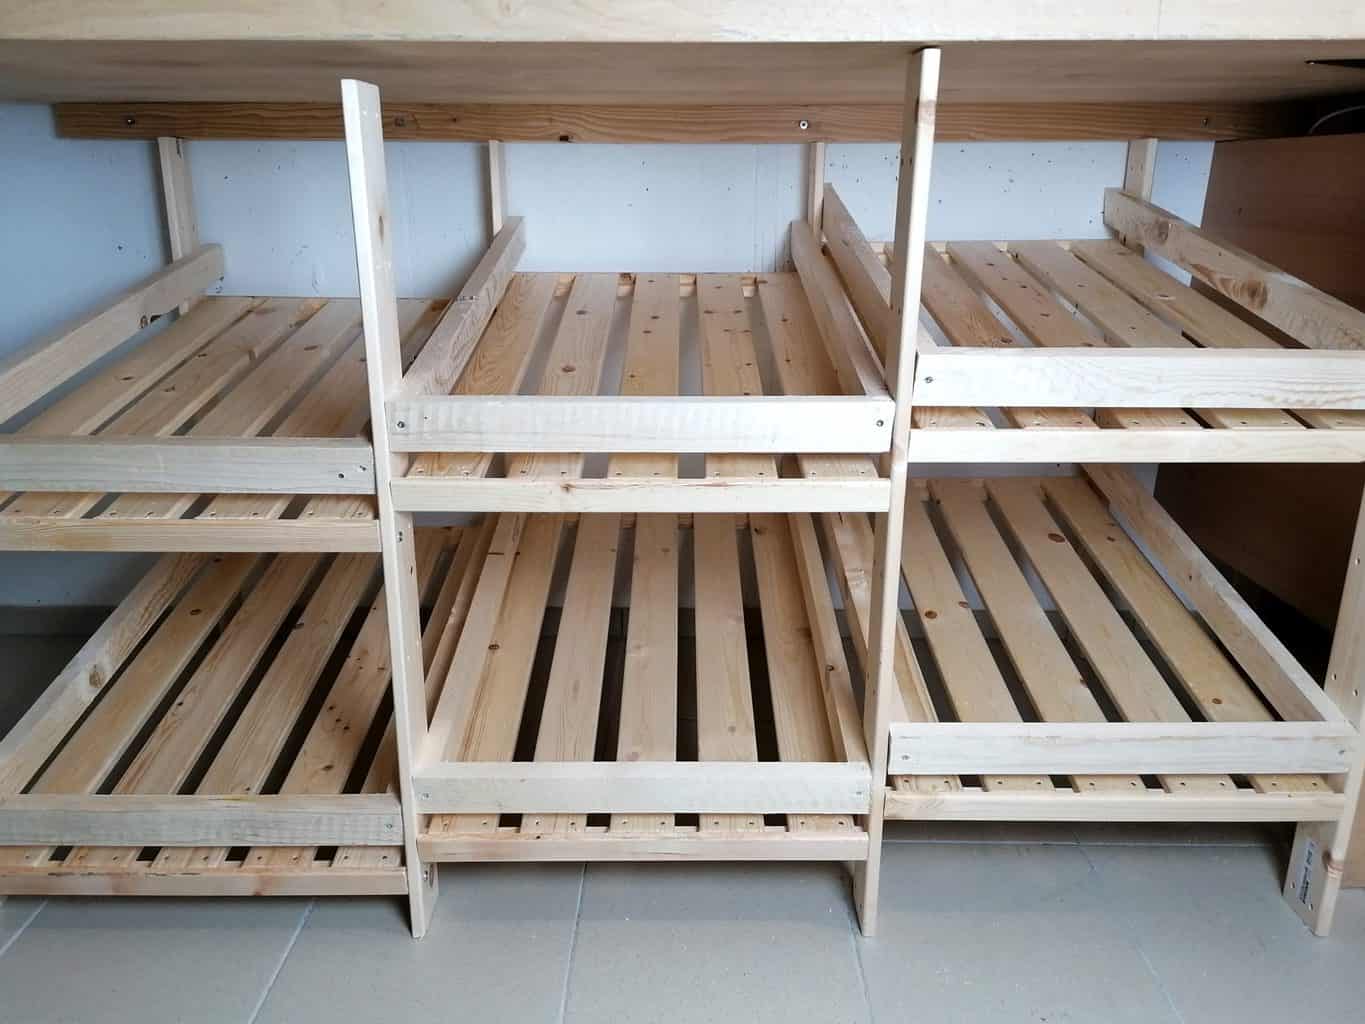
    Repeat the same for the remaining units, using the alternate slots to keep achieving the angle.

  • Step 7:

    Cut the timber roofing batten to fit the 3 edges of each shelf, leaving about a 3cm gap between the shelf and the cut batten — this stops potatoes or apples from rolling off onto the ground.

  • Step 8 (final):

    Fix the timber batten to 3 sides of each shelf, leaving the back open, since it already has support from the wall. The end result has a step-like appearance — the DIY IKEA vegetable and fruit storage rack is ready.

Why We Made This Instead of Buying One

Customized or ready-made vegetable storage racks are an option, but they run expensive — and there was absolutely no space in the cellar to fit one anyway. The only space available was below the work bench.

That work table was built 20 years ago, fixing a thick wooden board meant for durability to the wall, with 2 additional legs toward the front for support. It’s already moved 2 homes since — used now for packing things to sell, and for fixing things and carpentry.

To save money, the best option was the Hejne shelving system from IKEA — the most budget-friendly option, and with a little tweaking, it became a fully customized vegetable and fruit storage rack. The whole project cost around SFr. 65 for materials, with the necessary tools already on hand.

Points to Consider for Your Storage Rack

Leave gaps between wooden racks: this helps air the vegetables and prevents mold.
Store in a cool, dark spot: light causes roots to sprout quickly, shortening how long potatoes can be stored.
Harvest potatoes in autumn: this timing is ideal for long-term storage through the cold winter months.
Use natural, unpainted wood: plain wooden shelving is the ideal material for this kind of rack.

Sizing It to Your Space

The DIY work table this rack was built for measures 90cm in height, 147cm in width, and 54cm in depth — requiring 1 full Hejne shelving unit and 2 extra shelves from the same series. The underlying principle stays the same for a bigger unit; just scale up the materials to match.

Health Benefits

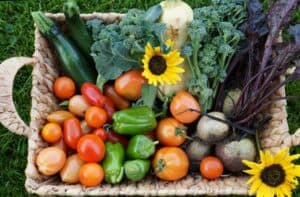
Come harvest time, a productive garden can easily produce more than can be eaten at once — a look at one such summer harvest shows just how much a single season can bring in.

Watch the Video

Recipe Card

Print
clock clock iconcutlery cutlery iconflag flag iconfolder folder iconinstagram instagram iconpinterest pinterest iconfacebook facebook iconprint print iconsquares squares iconheart heart iconheart solid heart solid icon
Ikea hack for vegetable storage

DIY IKEA Hack | Low Cost Fruit & Veggie Storage Rack | Hejne Series


5 Stars 4 Stars 3 Stars 2 Stars 1 Star

No reviews

  • Total Time: 210
  • Yield: 1 storage rack 1x

Description

A budget-friendly DIY vegetable and fruit storage rack, built from an IKEA Hejne shelving unit, sized to fit underneath an existing workbench.


Ingredients

Scale
  • 1 Hejne shelving unit from IKEA (78 x 50 x 171 cm)
  • 1 Hejne extra shelves (77 x 47 cm)
  • Timber roofing battens, 2.4cm x 4.8cm (or 1″ x 2″)
  • Screws
  • Drill kit
  • Standard folding ruler
  • Jig saw

Instructions

  • Cut the 4 vertical frames (measuring 171cm) that support the shelves into halves, making 8 frames. Adjust these frames to the height of your table.

  • Fix the first set of frames to the table block from below. If the table is attached to a wall, also attach the frames to the table at the back for extra support. Make sure the holes in each frame mirror each other while fixing.

  • Screw the first shelf in at a sloping angle rather than straight into the IKEA slots — this lets potatoes roll easily.

  • Fix the next frame together with the first shelf, then fix the next group of shelves.

  • Fix the lower shelf about 5cm higher than the previous one. The original IKEA slot won’t work here since it’s already used for the first shelf, so a new one needs to be made.

  • Repeat for the remaining units, using the alternate slots to keep achieving the angle.

  • Cut the timber roofing batten to fit the 3 edges of each shelf, leaving about a 3cm gap between the shelf and the batten — this stops potatoes or apples from rolling off onto the ground.

  • Fix the timber batten to 3 sides of each shelf, leaving the back open since it already has support from the wall.

Notes

This project cost around SFr. 65 for materials, using tools already on hand. This size works for a table 90cm tall, 147cm wide, and 54cm deep — scale the number of shelving units up or down for a different size table.

  • Prep Time: 30
  • Cook Time: 180
  • Category: DIY Tutorials

Nutrition

  • Serving Size: 1
Your feedback is valuable

Thank you for taking the time to read the Ikea hack for vegetable storage post. I hope this DIY post is useful for you. Leave me a comment, I’d really love to know! Also tag me on Instagram @swisshomegardenofficial. Thank you so much for visiting Vital Fair Living – we’re so happy you’re here!

Frequently Asked Questions

Apples and onions release ethylene gas, which causes potatoes to sprout new roots sooner — keeping them in separate rooms helps them last longer.

A sloped shelf lets potatoes roll easily rather than sitting in one spot, which was the practical reason for it here instead of using IKEA’s straight slots.

Around SFr. 65 for materials, using tools that were already on hand — a much cheaper option than a ready-made or customized vegetable storage unit.

Leave a Reply
0 0 votes
Article Rating
Subscribe
Notify of
guest
0 Comments
Oldest
Newest Most Voted