
Hot and Sweet Pepper Jelly
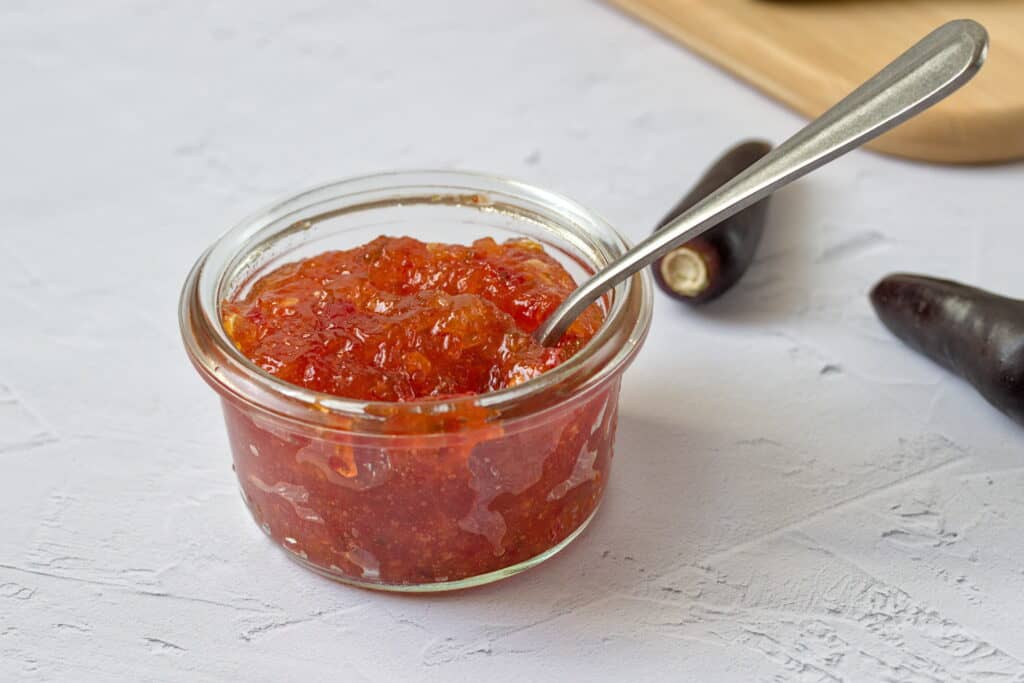
Hot and Sweet Pepper Jelly Ingredients Cooking Instructions Jump to Recipe Home If you’re looking for a unique and flavorful condiment that combines a touch of sweetness with a spicy kick, then this Hot and Sweet Pepper Jelly is the perfect choice. If you’re looking for a unique and flavorful condiment that combines a touch of sweetness with a spicy kick, then this Hot and Sweet Pepper Jelly is the perfect choice. This vibrant jelly is a delightful addition, it pairs well with a variety of dishes from cheese platters to other spreads of your choice. Making your own hot pepper jelly at home is fun. Moreover, it allows you to customize the heat level to your liking. My daughter, of late has got a taste for some spicy condiments. So, I try to make condiments like Fermented hot sauce, hot chili oil and this pepper jelly in order to make it more palatable for her too. Due to lack of time we decided to make them into jams. I will get to that in the second half of this blog post. Table of Contents What is Hot and Sweet Pepper Jelly? Hot Pepper Jelly is a sweet and spicy preserve made from a mix of hot peppers, sugar, and vinegar. The result is a jelly with a beautiful color and a bold flavor that balances sweetness and heat. This versatile condiment can be used as a glaze, spread, or dipping sauce, thus making it a must-have in your kitchen. History of Pepper Jelly The Origins of Pepper Jelly: Pepper jelly has its roots in Southern United States cuisine, where preserving fruits and vegetables in jellies and jams has been a longstanding tradition. The idea of combining spicy peppers with sweet jellies is thought to have emerged as a way to use up an abundant pepper harvest and create a versatile condiment that could complement a variety of dishes. Tools you may need Disclosure: This post contains affiliate links, meaning, at no additional cost to you, we will earn a small commission if you click through and make a purchase. Learn more Sterilized Jam Jars Funnel for filling Blender Heavy bottom Pot Mixing bowl How to make Hot and Sweet Pepper Jelly? Ingredients List 1 chopped bell pepper (red or green) 1 cup or 20 finely chopped hot peppers (such as jalapeños, serranos, or habaneros, seeds removed for less heat) 3 cups of pectin sugar 1 cup apple cider vinegar Juice of 1 lemon 1/2 teaspoon salt Cooking Instructions Prepare the Peppers: Wear gloves in order to protect your hands from the heat of the peppers. I have experienced heat on my hands for almost a week because I forgot to wear the gloves once. Remove the stems, seeds, and membranes from the hot peppers (you can leave some seeds if you prefer a spicier jelly). Chop them roughly and then blend it to a rough consistency. Cook the Peppers: Combine the blended peppers after filtering out the excess liquid with pectin sugar, apple cider vinegar, and salt in a thick bottom pot or saucepan. Remove the liquid from the crushed peppers, only if you want the jelly to be thicker, otherwise its not needed. Bring the mixture to a boil over medium-high heat, then reduce the heat and let it simmer for about 10 minutes.Increase the heat and bring the mixture back to a rolling boil. Boil for 1 minute, stirring constantly. Skim the Foam Skim off any foam that forms on the surface of the jelly using a metal spoon. This will help to ensure a clear jelly, if you want a clear jelly. Plate Test Prior to starting the jam, keep a plate in the freezer. Then drop a little of the jelly and see if it has attained the required consistency. Canning the Jelly: Ladle the hot jelly into sterilized jars, leaving about 1 cm of head space at the top. Wipe the rims of the jars with a clean, damp cloth, and apply the lids and screw bands. Process the jars in a boiling water bath for 10 minutes to ensure they are sealed properly. Remove the jars and let them cool completely. Check the seals after 24 hours – the lids should not flex up and down when pressed. Serving Suggestions Hot Pepper Jelly is incredibly versatile and can be used in numerous ways: Cheese Platters: Serve with cream cheese or goat cheese on crackers for a delightful appetizer.Glaze: Use as a glaze for grilled stuff.Sandwich Spread: Add to sandwiches or burgers for a sweet and spicy kick.Condiment: Use as a dip for spring rolls.Breakfast: Spread on toast, bagels, or scones for a sweet and spicy breakfast treat. Tips for the Perfect Hot and Sweet Pepper Jelly Adjusting the Heat: Customize the heat level by adjusting the amount of hot pepper seeds you include.Consistency: Ensure the jelly sets properly by following the boiling times exactly. If you are using Pectin separately, it needs to boil for the correct amount of time to activate and set the jelly.Sterilization: Properly sterilize jars and lids to prevent contamination and ensure a long shelf life. Types of Peppers you can use While jalapeños are the most commonly used pepper for hot pepper jelly, you can experiment with other types to customize the flavor and heat level: Jalapeños: Mild to medium heat, widely available.Serranos: Slightly hotter than jalapeños, with a bright, fresh flavor.Habaneros: Very hot, with a fruity undertone.Bell Peppers: No heat, but adds color and sweetness. Mixing different peppers can create a unique balance of flavors and colors. Flavor Variations of Sweet and Hot Pepper Jelly Although, the basic recipe is delicious, you can experiment with different ingredients to create unique flavor profiles: Fruit Additions: Try adding crushed pineapple, mango, or apricots for a fruity twist.Herbs: Fresh herbs like rosemary or thyme can add an aromatic depth.Spices: Add a pinch of cinnamon, cloves, or allspice for a warm spicy note. Health Benefits Peppers are rich in vitamins A and C, potassium,
Hot Chili Oil

Hot chili oil is a must-have condiment for anyone who loves bold flavors and a bit of heat. Making it at home allows you to create a version that’s perfectly suited to your taste preferences. Whether you’re adding a drizzle to your favorite dishes or using it as a dipping sauce, this spicy oil is sure to become a kitchen staple.
Pawpaw Jam Recipe
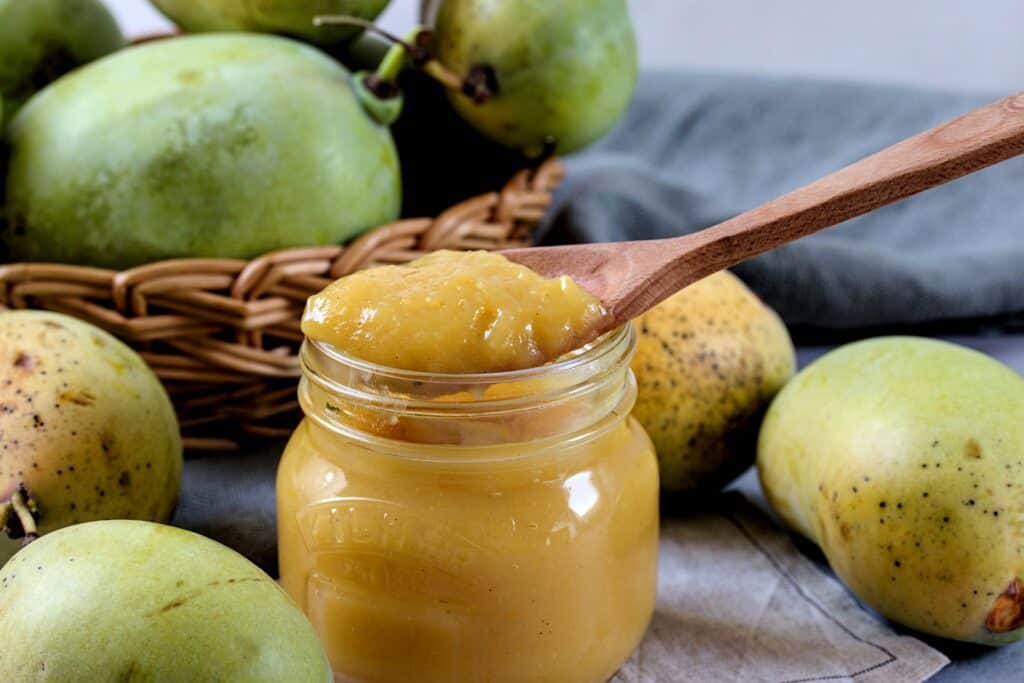
Ingredients Cooking Instructions Jump to Recipe Disclosure: This post contains affiliate links, meaning, at no additional cost to you, we will earn a small commission if you click through and make a purchase. Learn more Home Pawpaws are the fruit of the Asimina triloba tree, which is native to the eastern United States and southern Canada. We waited 5 years patiently to reap the benefits of our Pawpaw Tree. Finally, this year we had an abundance of this tasty tropical tasting fruit. The taste and flavor is a delicious combination of banana, mango and custard apple. Our Pawpaw fruits look a little like mangoes. But anyway who cares how it looks, as long as its tasty and we are able to harvest our own fruits. With so much of abundance, I wanted to preserve this harvest, so I made this easy and delicious Pawpaw jam recipe. While starting our garden, we were looking for some easy maintenance trees which gives us delicious fruits. And we went a little wild with planting a few. Some of the other trees we planted take longer to fruit. But surprisingly, this year we had a lot of paw paws to harvest. We shared our abundance with neighbors and friends too. For most of our neighbors this was a novelty to try. Pawpaws are the fruit of the Asimina triloba tree, which is native to the eastern United States and southern Canada. Pawpaws are the northernmost member of the Annonaceae plant family, which consists mainly of tropical and subtropical plants. They’re considered the largest edible fruit native to North America, measuring 2–6 inches (5–16 cm) and 1–3 inches wide (3–7 cm). The climate in Switzerland is similar to that of North America, therefore, we thought planting them would be great for our food forest. We just had to be patient for this many years to reap the benefit. We planted 2 trees and one of the trees gave us bigger sized fruits but the other one although younger still produced a lot. My husband and I ate almost 2 to 3 fruits everyday as soon as they ripened. But I still had so much that I made a pawpaw jam to preserve it for winter. I make a lot of jams and have shared recipes regularly on this blog. Check out my other jam recipes. Table of Contents Tools you may need Disclosure: This post contains affiliate links, meaning, at no additional cost to you, we will earn a small commission if you click through and make a purchase. Learn more Glass Jars Funnel for filling Heavy bottom Pot Mixing bowl Wooden cutting board How to make Pawpaw Jam? Ingredients List 2 Kg of ripe pawpaws pureed 2 cups of water 1/2 cup of lemon juice ( I used the bottled one ) 1 Kg of white castor sugar 1 tsp cinnamon powder 2 tsp Vanilla powder Juice and grated peel of that orange ( Optional ) Cooking Instructions Wash and cut the pawpaw. Remove the flesh from the fruit by scooping it with a spoon after removing the seeds. Discard the skin of the fruit. Mash the pulp using a food mill, immersion blender or a food processor. In a heavy bottom large saucepan mix all the ingredients and cook down on low until the mixture thickens. This will take about an hour or more depending on the quantity you have. Do the plate test. Once the jam sets switch off the heat. Fill into sterilized glass jars leaving about 1 cm before sealing the jars. Do a water bath canning for 10 minutes. Tips for making Pawpaw Jam Recipe The jam doesn’t need pectin and it sets easily without it if you cook it longer. Since, pawpaws are not extremely sweet, I prefer to add enough sugar to preserve it. For doing the plate test, set a plate in the freezer. Drop a little of the cooked jam on to the cold plate and tilt it a little, if the jam stops flowing then the jam is ready to bottle. Recipe Card Your feedback is valuable If you try this recipe and love it, I would love if you come back and gave it 5 stars! Thank you so much for visiting Vial Fair Living – we’re so happy you’re here! I would love it if you can share this recipe using the social media buttons you see next to the post. Frequently Asked Questions How long can you store Pawpaw jam? I am not very sure about this, as this was the first time I had access to this fruit. Generally, all the jams I make store well for a year or even more. Because sugar is the preservative. Although, I recently got a pressure canning cooker, I am yet to try canning jams with it. What can you use pawpaw jam for and can you eat it raw? You can add the jam to a smoothie, or pudding and on bread toast. Yes, you can eat the fruit raw which is what we love the most. Wash and cut into half remove the seeds and scoop out the flesh of the fruit and eat it like a pudding. Make sure they are soft, they usually turn somewhat blackish, but don’t wait too long with it. Leave a ReplyPlease enable JavaScript in your browser to complete this form.Name *Email *Website / URLMessageCheckboxes Yes, add me to your mailing list. Submit Popular Recipes Subscribe Signup for our NewsletterUnlock a world of flavor, creativity, and green living. Subscribe for exclusive recipes, DIY tutorials, and gardening advice.Please enable JavaScript in your browser to complete this form.Name *Email * Submit Popular Recipes
Best Homemade Pizza Sauce
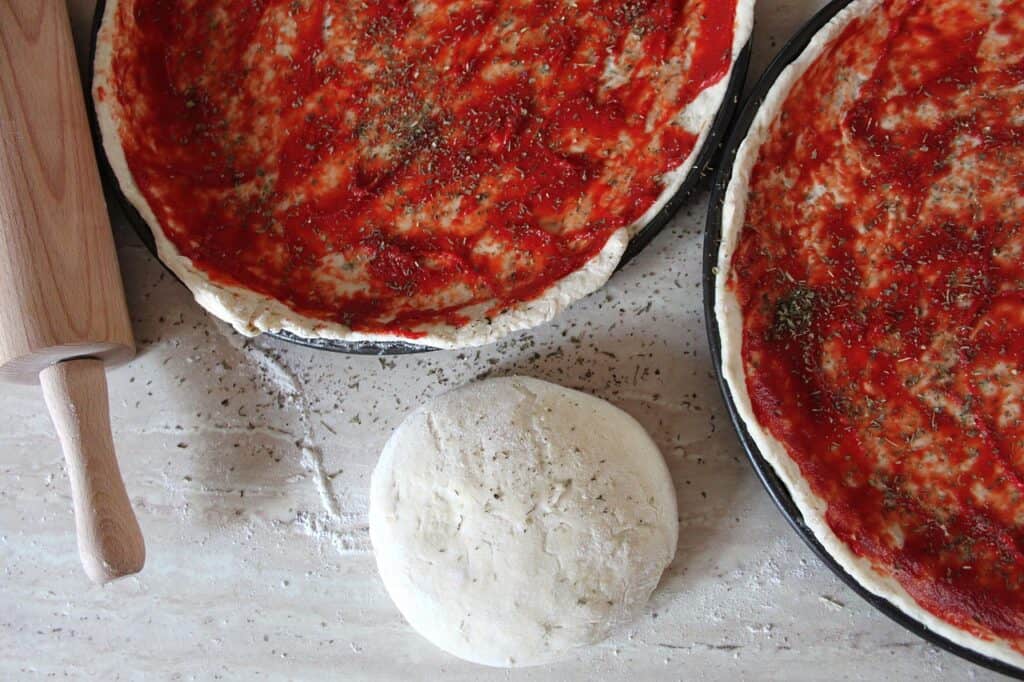
Ingredients Cooking Instructions Jump to Recipe Disclosure: This post contains affiliate links, meaning, at no additional cost to you, we will earn a small commission if you click through and make a purchase. Learn more Home If you’re looking for a unique and flavorful condiment that combines a touch of sweetness with a spicy kick, then this Hot and Sweet Pepper Jelly is the perfect choice. Every Summer, we plant a lot of tomatoes and when they are ripe, they ripen at the same time. That is when I make a lot of sauces. Pizzas are a hot favorite over the weekends at our home. I seldom buy any ready sauces. Preparing from scratch using sun ripened tomatoes is going to be one of the best homemade pizza sauce recipes. I have been making this homemade pizza sauce for a little more than 25 years and it doesn’t disappoint. But, during the winter months, I have to use tinned tomatoes or plain tomato purees to make my own sauces. On the other hand, if I can preserve them, they last almost a year sometimes. Table of Contents What is Pizza Sauce? With the advent of globalization and global media, who hasn’t heard of pizzas. Well to make everything from scratch takes practice and the sheer will to eat healthy. Moreover, if you have a productive garden with a good harvest, this is the sauce for you. I have been making the pizza base from scratch with freshly ground spelt berries using our grain mill. Check out my older post on from scratch Homemade Pizza Recipe. Pizza sauce is prepared with plain tomatoe puree. The sauce is usually spiced with oregano, garlic, salt, Italian seasoning, olive oil, salt, black pepper, and sugar for a tangy flavor. The essence of the tangy flavor is to compliment the fats and cheese on the pizza. Sugar is not required, but it is added to enhance the tangy flavor of the tomatoes. It is not necessary to cook the sauce, but I do it to get a thicker sauce. Because some of our homegrown tomatoes are quite watery. This is especially so, if we make the sauce from fresh tomatoes. Tomatoes vary in their water content and sometimes we have accidentally planted a watery variety. Moreover, a watery sauce will ruin the pizza base and make it soggy, hence I cook it down to a consistency between paste and sauce. Tools you may need Disclosure: This post contains affiliate links, meaning, at no additional cost to you, we will earn a small commission if you click through and make a purchase. Learn more Heavy Bottom Pan Glass Jars if you want to can for storage How to make Hot and Sweet Pepper Jelly? Ingredients List 6 -7 table spoons of extra virgin olive oil 4 cloves of garlic 1 liter of tomato puree 1 tablespoon of Tomato concentrate paste a pinch of asafoetida 1/2 tsp of dried thyme 6 fresh basil leaves ( you can also use dried) 1 tsp of Oregano 2 teaspoons of Himalaya pink salt (approx.) 1/2 tsp of black pepper pinch of baking powder. Cooking Instructions Pour about 4 tablespoon of olive oil into a heavy bottom pan. Add the asafoetida and crush the garlic directly into the oil and mix the tomato puree. Give it a good stir and cook under low heat. Add the tomato paste concentrate and stir to thicken the sauce. Reduce the heat and let the sauce thicken. When the sauce has cooked down considerably, add the dried herbs, pepper and fresh herbs. Mix in the salt at the very end and just cook it shortly. Tips for making the Best Homemade Pizza Sauce The proportion of salt is almost always around 2%, so its best to add it at the end of cooking process. Since tomatoes are acidic adding a pinch of baking powder will neutralize the acidity. This also sweetens the tomato sauce. On the other hand if you want to can the sauce, you can skip adding the baking powder. Water Bath Canning Procedure Add 1 tablespoon of lemon juice for acidity to every 500 ml of the sauce.This is considered safe. Fill the sauce into sterilized jars once sauce was ready. Use a funnel to fill the jars and get the air bubbles out using a spatula. Wipe out any remaining sauces around the rims of the jar before closing the lid tightly. Place them in boiling water for 20 min. You will hear the lids pop up which is a sign that they have sealed airtight. Remove them carefully and place them on a wooden board to avoid the jars from cracking. Cool it for 24 hours before storing. If you are using 2 way lid, remove the ring and leave only the top lid on before storing in cool and dark place. Recipe Card Your feedback is valuable If you try this recipe and love it, I would love if you come back and gave it 5 stars! Thank you so much for visiting Vial Fair Living – we’re so happy you’re here! I would love it if you can share this recipe using the social media buttons you see next to the post. Frequently Asked Questions Can you Freeze Homemade Pizza Sauce? Yes, you can freeze your pizza sauce instead of canning it. But, to freeze the pizza sauce, let the sauce cool completely. Pour sauce into to freezer-safe containers.. Use the pizza sauce within 3 months. Leave a ReplyPlease enable JavaScript in your browser to complete this form.Name *Email *Website / URLMessageCheckboxes Yes, add me to your mailing list. Submit Popular Recipes Subscribe Signup for our NewsletterUnlock a world of flavor, creativity, and green living. Subscribe for exclusive recipes, DIY tutorials, and gardening advice.Please enable JavaScript in your browser to complete this form.Name *Email * Submit Popular Recipes
Best Elderberry Compote Recipe
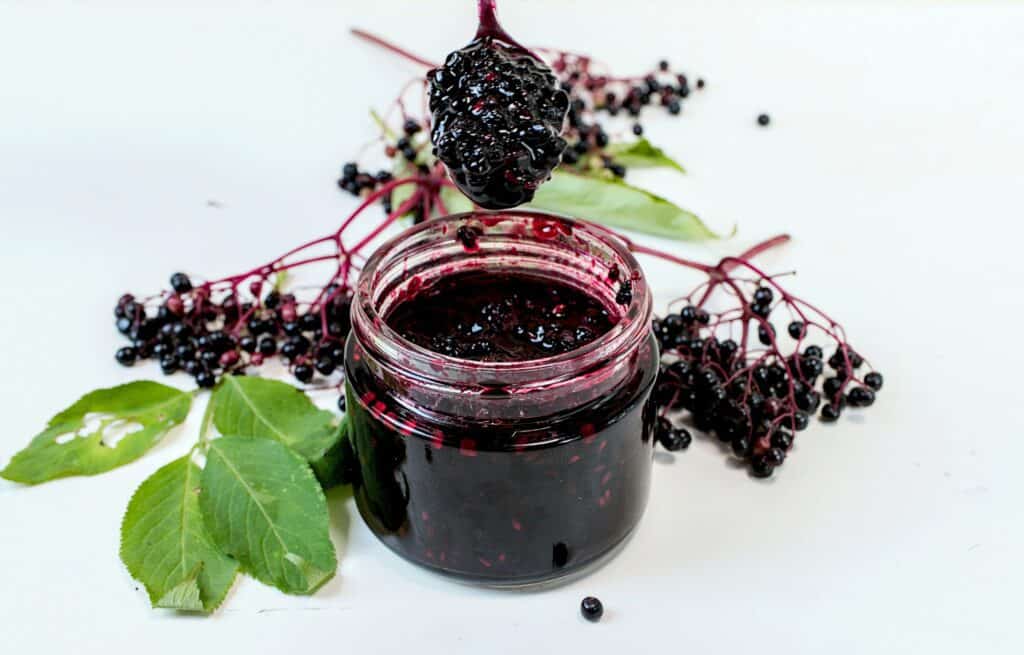
This is probably one of the best elderberry compote recipes, I have come across. I substituted cinnamon with vanilla bean.
Fresh Rose Petals Cordial ( Rose Syrup )
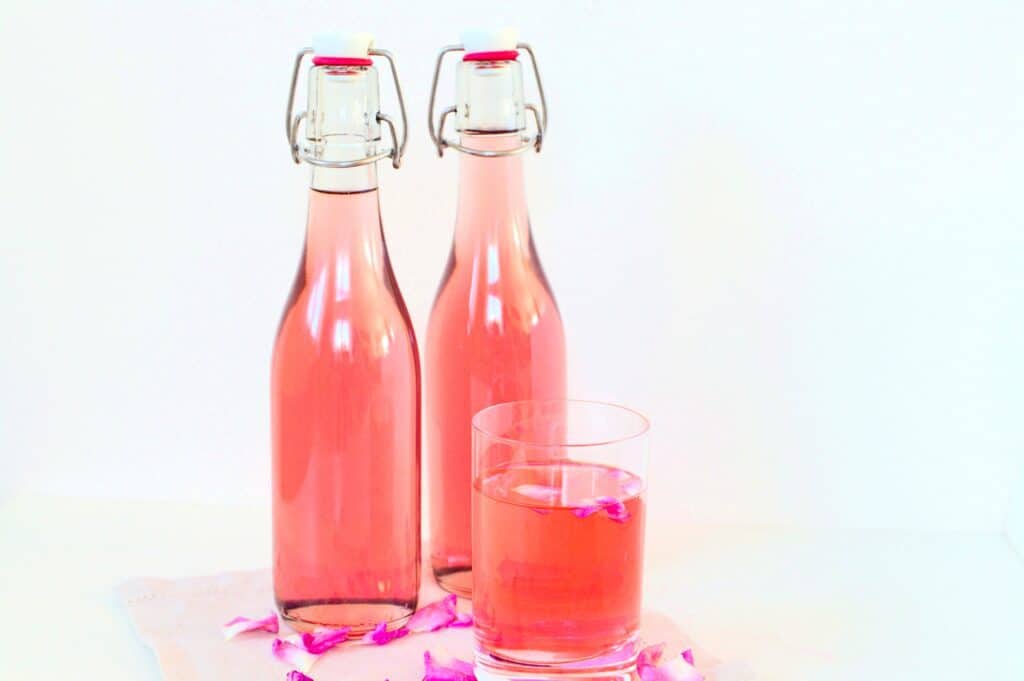
Ingredients Cooking Instructions Jump to Recipe Disclosure: This post contains affiliate links, meaning, at no additional cost to you, we will earn a small commission if you click through and make a purchase. Learn more Home Do you want to enjoy your summer roses in a bottle ? Then the secret is to make this fresh rose petals cordial or also known as rose syrup. This cordial like any other is great for making refreshing non-alcoholic summer drinks. Moreover, you can top this on your homemade ice-creams and desserts too. Rose syrup, rose sherbet and rose milk were a favorite of mine while growing up in India. We used rose water for skin care, ceremonies etc. Since roses are rich in polyphenols, that help neutralize free radicals and contribute to good health. Therefore, they are used in many cosmetics and remedies. For all these reasons, I want to preserve our summer roses before they dry out, I pick them and make rose jam and cordials. I also make plain rose water and use it as a skin cleanser. We have only 2 bushes in our garden and oh boy, they are so fragrant. We can smell our roses just walking past our driveway. They do not have a huge petal or size but compensate with their smell. I don’t even know if they are the prettiest looking lot, but no complaints because I enjoy their fragrance and uses. Table of Contents Tools you may need Disclosure: This post contains affiliate links, meaning, at no additional cost to you, we will earn a small commission if you click through and make a purchase. Learn more Funnel Clip top glass jars Heavy bottom pot How to make Rose Petals Cordial? Ingredients List 50 gm of fresh rose petals- cleaned and washed 500 ml of filtered water 600 gm of castor sugar 1 tbsp of freshly pressed lemon juice 1 drop of organic rose essential oil ( optional ) Instructions Combine the rose petals with sugar and filtered water. Let it simmer on low flame till all the sugar is completely dissolved. Close the lid and simmer for a further of 10 minutes under very low flame. You want all the rose essential oils to seep through the liquid, so don’t boil. Remove from heat, cool a little and add the lemon juice. You will see that the color of the syrup is turning back to a vibrant pink. Add a drop of pure rose essential oil when the cordial has completely cooled. Close the pot and set in in the refrigerator for a minimum of 24 hours. The longer the better. Filter it and store the cordial in sterilized glass jars. Tips to make Fresh Rose Petals Cordial Pick only roses from low traffic area and use roses which are organically grown Preferably use castor sugar, because they are best for long term storage. Use filtered water for the syrup. Since, we have Berkey, I used water from Berkey Water filter. Infuse the roses for 24 hours to get the maximum essence and flavor. If you want a stronger fragrance, add a drop of pure rose essential oil. Since, we want to extract the maximum of natural essential oils from the roses, cook them on very low flame. Tips to use Rose Cordial Dilute it with plain or sparkling water. To a large drink glass add 2 tablespoons of rose cordial. Rose syrup makes a great topping on ice creams, crepes, cakes and pancakes. Drizzle a little on the finished prep. You can make cold rose milk – add 2 to 3 teaspoons of rose cordial into cold milk. For additional aroma and flavor mix in rose petal jam. ( Rose milk was my childhood favorite) Drizzle a small amount over your dessert, cakes, crepes, waffles, ice cream, or pancakes. You can also use rose syrup as a sweetener. Mix in to yogurt in addition to some jam and serve it as rose flavored sweet yogurt. Health Benefits Since roses are rich in polyphenols, that help neutralize free radicals and contribute to good health. Therefore, they are used in many cosmetics and remedies. Watch the Video Recipe Card Your feedback is valuable If you try this recipe and love it, I would love if you come back and gave it 5 stars! Thank you so much for visiting Vial Fair Living – we’re so happy you’re here! I would love it if you can share this recipe using the social media buttons you see next to the post. Frequently Asked Questions How to Store Rose Syrup Store them in sterilized glass jar and in the refrigerator. If you want to extend the life, try freezing them in cubes and use as needed. I personally, don’t use the freezer so much. On the other hand, if you want to store without refrigeration, pasteurize it by boiling the bottles in hot water for 15 minutes Leave a ReplyPlease enable JavaScript in your browser to complete this form.Name *Email *Website / URLMessageCheckboxes Yes, add me to your mailing list. Submit Popular Recipes Subscribe Signup for our NewsletterUnlock a world of flavor, creativity, and green living. Subscribe for exclusive recipes, DIY tutorials, and gardening advice.Please enable JavaScript in your browser to complete this form.Name *Email * Submit Popular Recipes
How to make Wild Garlic Pesto Recipe
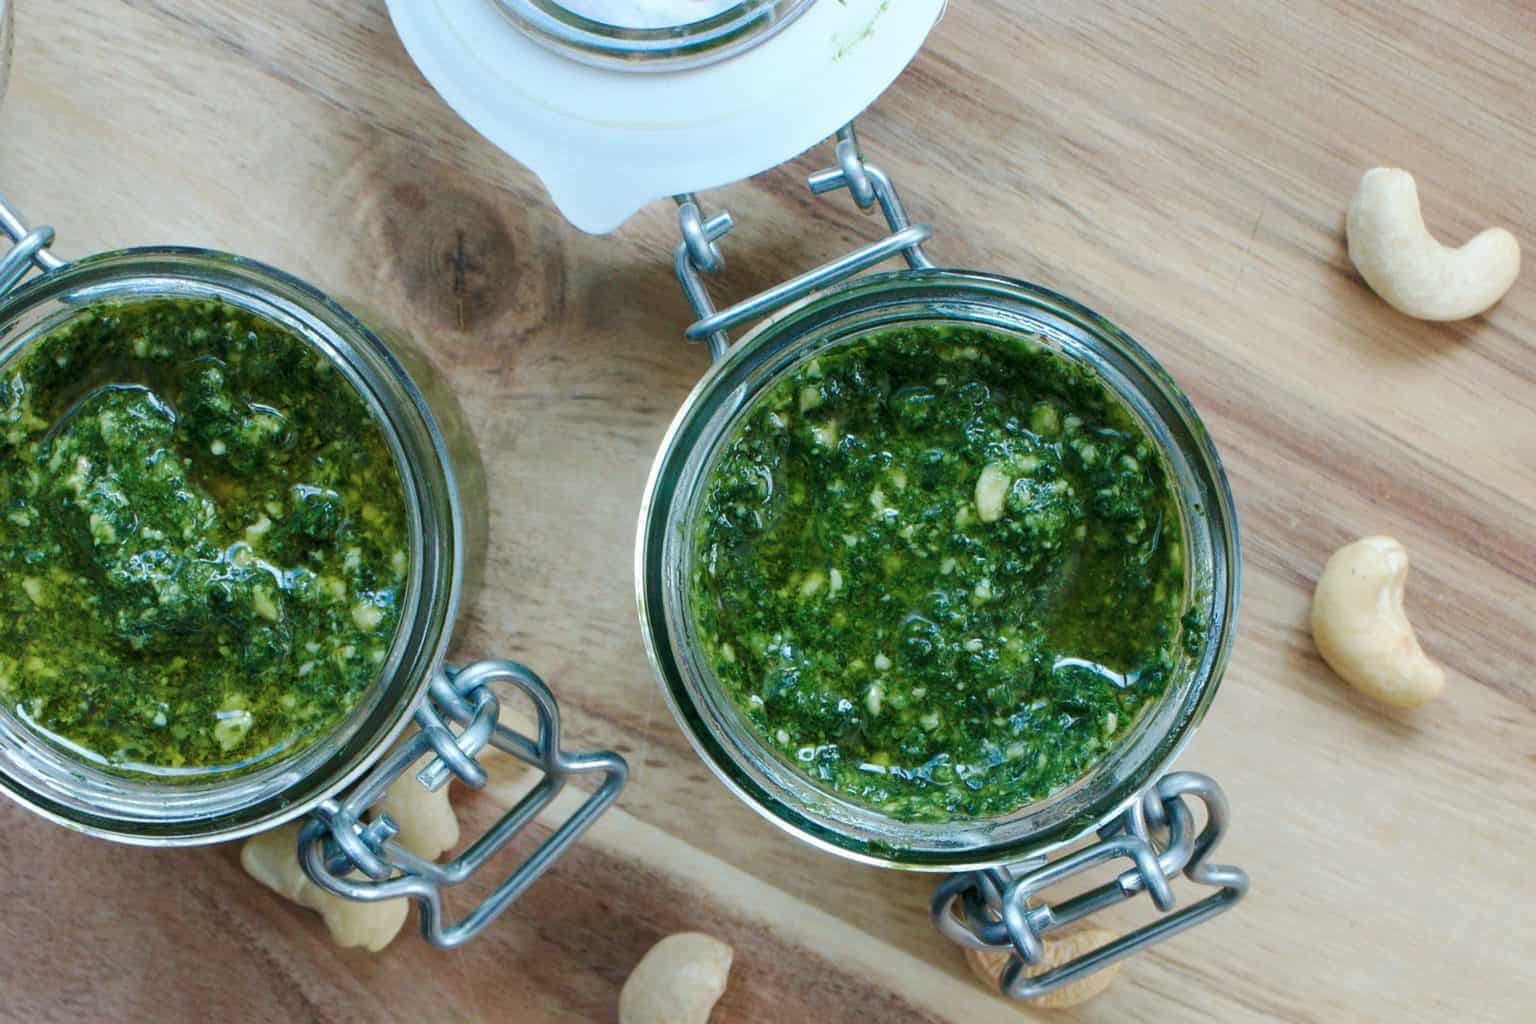
Ingredients Cooking Instructions Jump to Recipe Disclosure: This post contains affiliate links, meaning, at no additional cost to you, we will earn a small commission if you click through and make a purchase. Learn more Home You can easily forage a few wild edibles and wild garlic is one of them. My favorite way of using this wild edible is with a Wild Garlic Pesto Recipe. Its so easy to make and tastes great. Its that time of the year, when nature comes alive after a long winter. And with spring is also a lot of wild edibles around us which we can forage to add some greens to our diet. Hence, to get some precious greens as early as April, would be to forage and its all free. You can easily forage a few wild edibles and wild garlic is one of them. My favorite way of using this wild edible is with a Wild Garlic Pesto Recipe. Its so easy to make and tastes great. Spring is in the air and with the arrival of spring is also the smell of wild garlic. Wild garlic can be found in almost all woods in Northern Europe. They just spread around like beautiful carpets under shady and moist areas. In fact, before we cut down the trees in our backyard, they were also growing wildly in our plot. This post was originally published on 24th March 2020 and has been updated. Table of Contents How to forage for Wild Garlic? The best time to forage for wild garlic is between mid of March till the first week of April. The leaves will have the maximum flavor before they start flowering. The plants usually grow under damp and shade. You will have to look out for the long leaves with a bright color as shown in the photo. When you find the plant, pick the long leaves that are bright in color as seen in the photo above. Be sure to carefully pick the leaves from close to the ground but make sure to leave the bulb underground and intact for next year. Look out for leaves without bird droppings. Tips for picking Wild Garlic The best way to check that you’ve picked wild garlic is to crush the leaves in the palm and take a sniff. If it smells like garlic, then you’ve picked the right plant. Tools you may need Disclosure: This post contains affiliate links, meaning, at no additional cost to you, we will earn a small commission if you click through and make a purchase. Learn more Food Processor Cast Iron Pan How to make Wild Garlic Pesto? Ingredients List Ingredients for Wild Garlic Pesto Recipe Now that we have picked the wild garlic leaves there are many options on how to use them. We at home personally like Wild garlic pesto. I have already shared a wild garlic pesto recipe in an earlier post. Well this Wild Garlic Pesto recipe differs from the older one, in this recipe I am using cashew nuts instead of sun flower seeds. Other ingredients you will need are olive oil, salt and lemon juice. If you want to spice it up, add one red chilly but that is completely optional. Wild garlic is pungent enough. But I added a couple of pods of garlic to boost our immune system. This is also optional. 50 g of Cashew nuts 50 g of wild garlic leaves (washed and dried using a salad dryer ) Juice of a lemon or 1/2 lemon 1 red chilly (optional ) 2 garlic pods 100 ml of olive oil 1 teaspoon of salt Cooking Instructions First wash the leaves and dry them using a salad dryer. Lightly roast the cashew nuts in a heavy pan without any fat. Cool the nuts. Blitz all the ingredients in a food processor. Store in sterilized glass jars. Serving Suggestions Wild garlic pesto is ideal for pastas, risotto rice and even as bread spreads. I also serve it as a bread spread for my home baked Spelt Bread . You can also use the leaves mixed with other salad leaves. Watch the Video Recipe Card Your feedback is valuable If you try this recipe and love it, I would love if you come back and gave it 5 stars! Thank you so much for visiting Vial Fair Living – we’re so happy you’re here! I would love it if you can share this recipe using the social media buttons you see next to the post. Frequently Asked Questions Can you freeze or can the pesto? I haven’t frozen the pesto before. But this year, I wanted to prep some because of the difficult times we are now in. So I froze a small portion of it for later use. Regarding canning, well since I made a lot of pesto, I thought why not can some of it. After all, when you buy them from the stores they have a longer shelf life. So they are canning them too. Therefore, I have also canned a couple of bottles for trial and test out this method too. Know more about Wild Garlic : https://en.wikipedia.org/wiki/Allium Leave a ReplyPlease enable JavaScript in your browser to complete this form.Name *Email *Website / URLMessageCheckboxes Yes, add me to your mailing list. Submit Popular Recipes Subscribe Signup for our NewsletterUnlock a world of flavor, creativity, and green living. Subscribe for exclusive recipes, DIY tutorials, and gardening advice.Please enable JavaScript in your browser to complete this form.Name *Email * Submit Popular Recipes
Easy Elderflower Cordial Recipe
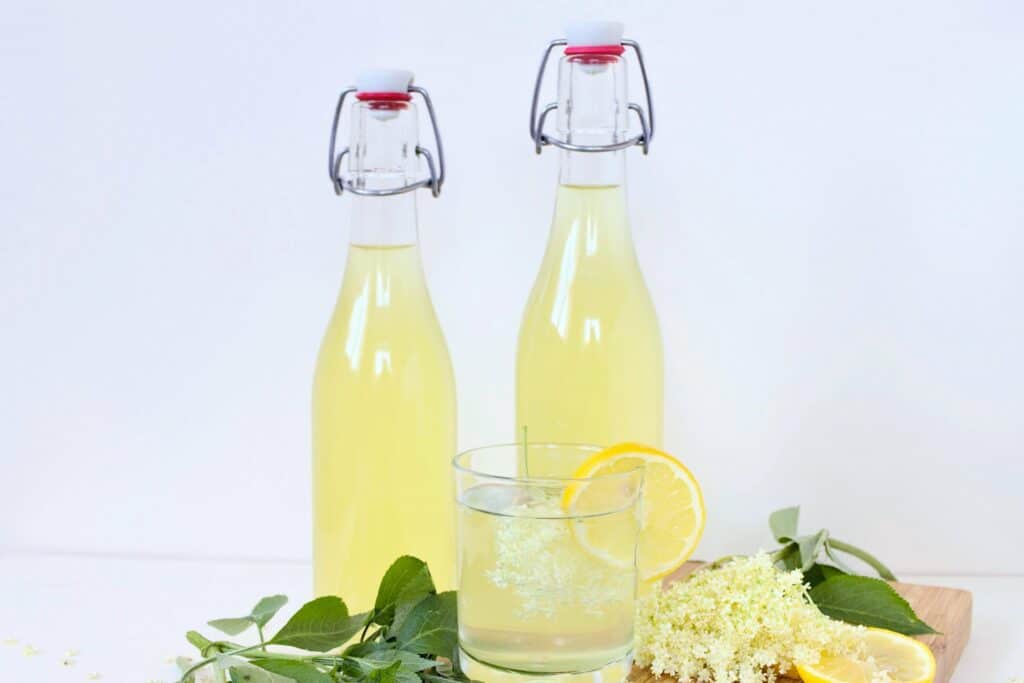
Ingredients Cooking Instructions Jump to Recipe Disclosure: This post contains affiliate links, meaning, at no additional cost to you, we will earn a small commission if you click through and make a purchase. Learn more Home With the arrival of spring, my garden comes alive with a lot of blooms. One of them is Elderflower. To preserve this heavily scented flower, I make this easy Elderflower cordial recipe, which makes refreshing drinks during summer. Because of its strong smell, elderflower cordial can be used also in ice creams, vinegar and cocktails for extra flavor. Table of Contents What is the difference between Cordial & Syrup? I have always wondered at this myself, until I discovered the technicalities. I guess a lot depends on the language usage and the country you are from. Cordial – Cordial technically refers to a tonic, syrup, or non-alcoholic drink that is frequently thought to be particularly sweet. Although, many people use the phrase cordial to refer to any form of liqueur with a low alcohol concentration, in theory it is not. Now comes the question of what is a syrup? Syrup is thinner in consistency with less sugar than syrup-based drinks such as cough syrups, chocolate sauce and pancake syrup. Then, what’s the difference between elderflower cordial and syrup? Elderflower cordial does not contain alcohol despite its name. If the recipe contains alcohol, it is known as Elderflower Liqueur known as St. Germain. Elderflower syrup and cordial are made with fresh lemon zest, lemon juice and elderflowers that are steeped in a simple syrup. Tools you may need Disclosure: This post contains affiliate links, meaning, at no additional cost to you, we will earn a small commission if you click through and make a purchase. Learn more Big stainless steel sauce pan. Sterilized swing top glass bottles Muslin Cheese Cloth How to make Elderflower Cordial Recipe? This recipe is quick and easy to make. Since, I have an abundance of these flowers growing in my back yard, I don’t need to forage them. Elderflower bushes are native to Europe and they grow wild. Although, I have a few bushes we do not pick all the berries or flowers for our own use. We leave a little of the berries for the birds. Since, the elderflower season is short, we have to pick them quickly about just the time they bloom. Otherwise, they turn to berries. On the other hand, with the berries you can make a jam mixed with apple, or make an immune boosting cold and flu syrup. The best time to pick the flowers is between late May to June. This also depends on the sub-climate in each zone of Europe. Ingredients List 2 lemons washed and sliced or cut into chunks 15 bunches Elderflower Blossoms leaves and stems removed as much as possible 1 kilogram granulated sugar 1 liter water 20 grams citric acid Juice of 2 lemons, strained. I love adding lemon juice for that extra zing. Cooking Instructions Shake any bugs off the elderflower and set it aside. It is not necessary to wash so that the flowers will still retain the smell and flavor. In a deep heavy bottom pot, bring the sugar and water to a boil. Add the strained lemon juice to it. Remove some of the lemon peel with a vegetable peeler, avoid the pith and cut the rest into slices. Add the cut lemon and the elderflower (flower first, stems sticking up) to the sugar syrup and then cover. Let it sit for 24 hours. Line a strainer with cheese cloth and set it over a bowl. Pour the syrup through the strainer carefully. Store in sterilized glass bottles. If you want to store them longer, do water bath canning for 20 minutes. Serving Suggestions Dilute the cordial with still or fizzy water. Add ice cubes if desired. Add a dollop of the syrup to ice creams and fruit salads. Tips to make Elderflower Cordial Recipe Use only the flowers and not the twigs for the recipe. Because, the root and twigs are poisonous. Pick the flowers from zero traffic area in order to avoid the petrol fumes, moreover it would be better from your own garden or a friends garden. Make the cordial quickly as soon as you pick the flowers in order to retain the scent. Pick the flowers on a dry and sunny day so, the flowers are not wet with dew. Pick flowers that have just opened. In case, some of the tiny buds are still closed while picking, don’t worry. Since, these young flowers will have the most scent and will give more flavor to your cordial. Avoid branches with brown or dead flowers. Best time to pick the flowers is when its sunny, in case its not, air dry them shortly in your home before making the cordial. Spread them on a tray with a tea towel to absorb the moisture. Recipe Card Your feedback is valuable If you try this recipe and love it, I would love if you come back and gave it 5 stars! Thank you so much for visiting Vial Fair Living – we’re so happy you’re here! I would love it if you can share this recipe using the social media buttons you see next to the post. Frequently Asked Questions How long can you store the Elderberry Cordial? If you want to store it longer than a few weeks, preserve the filled and sterilized jars with water bath canning. Can you freeze Elderberry cordial? Yes, you can. I usually freeze them in ice cube trays. On the other hand, you can also freeze them in plastic bottles or freezer safe bottles. Don’t fill to the brim, leave space before closing the caps on, in order to allow for expansion during freezing. Leave a ReplyPlease enable JavaScript in your browser to complete this form.Name *Email *Website / URLMessageCheckboxes Yes, add me to your mailing list. Submit Popular Recipes Subscribe Signup for
Pickled Green Tomato Salad
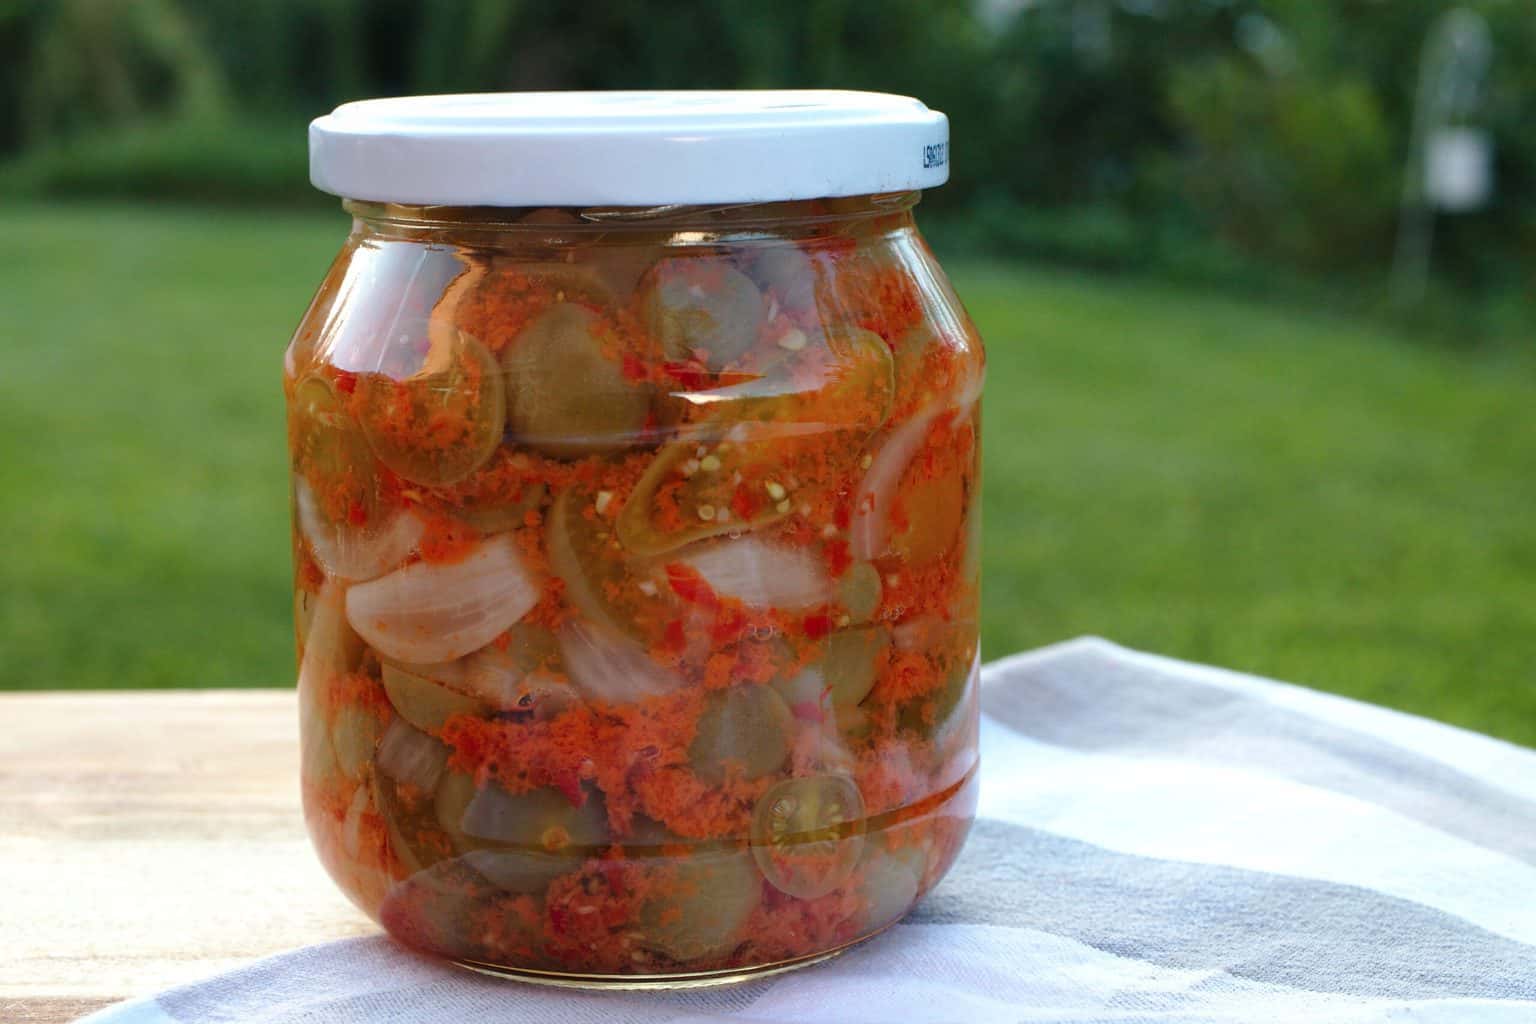
Serve these delicious and flavor packed pickled green tomato salad as a side dish or as a topping for your breads. The best recipe to use all those unripe tomatoes which do not get ripe by autumn.
Easy Homemade Fermented Pickles
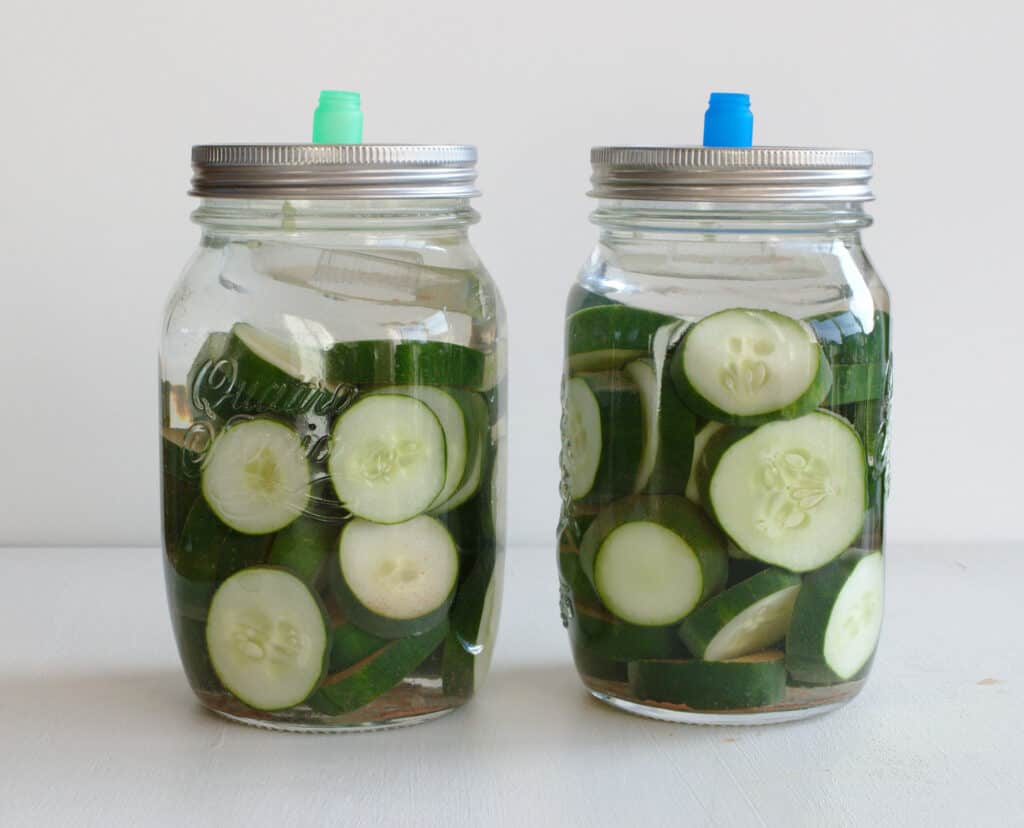
Making homemade fermented pickles are that easy and its no rocket science. Whats more you get your daily dose of probiotic, a must for a healthy gut. Learn how to make fermented pickles at home with the minimum of ingredients and tools.